This document contains all the configurations required for the setup of APISIX-Proxy for API Authentication in CX. Following configurations are the prerequisite before the enablement.
-
First go to your Keycloak instance and login, then go to the expertflow realm.

-
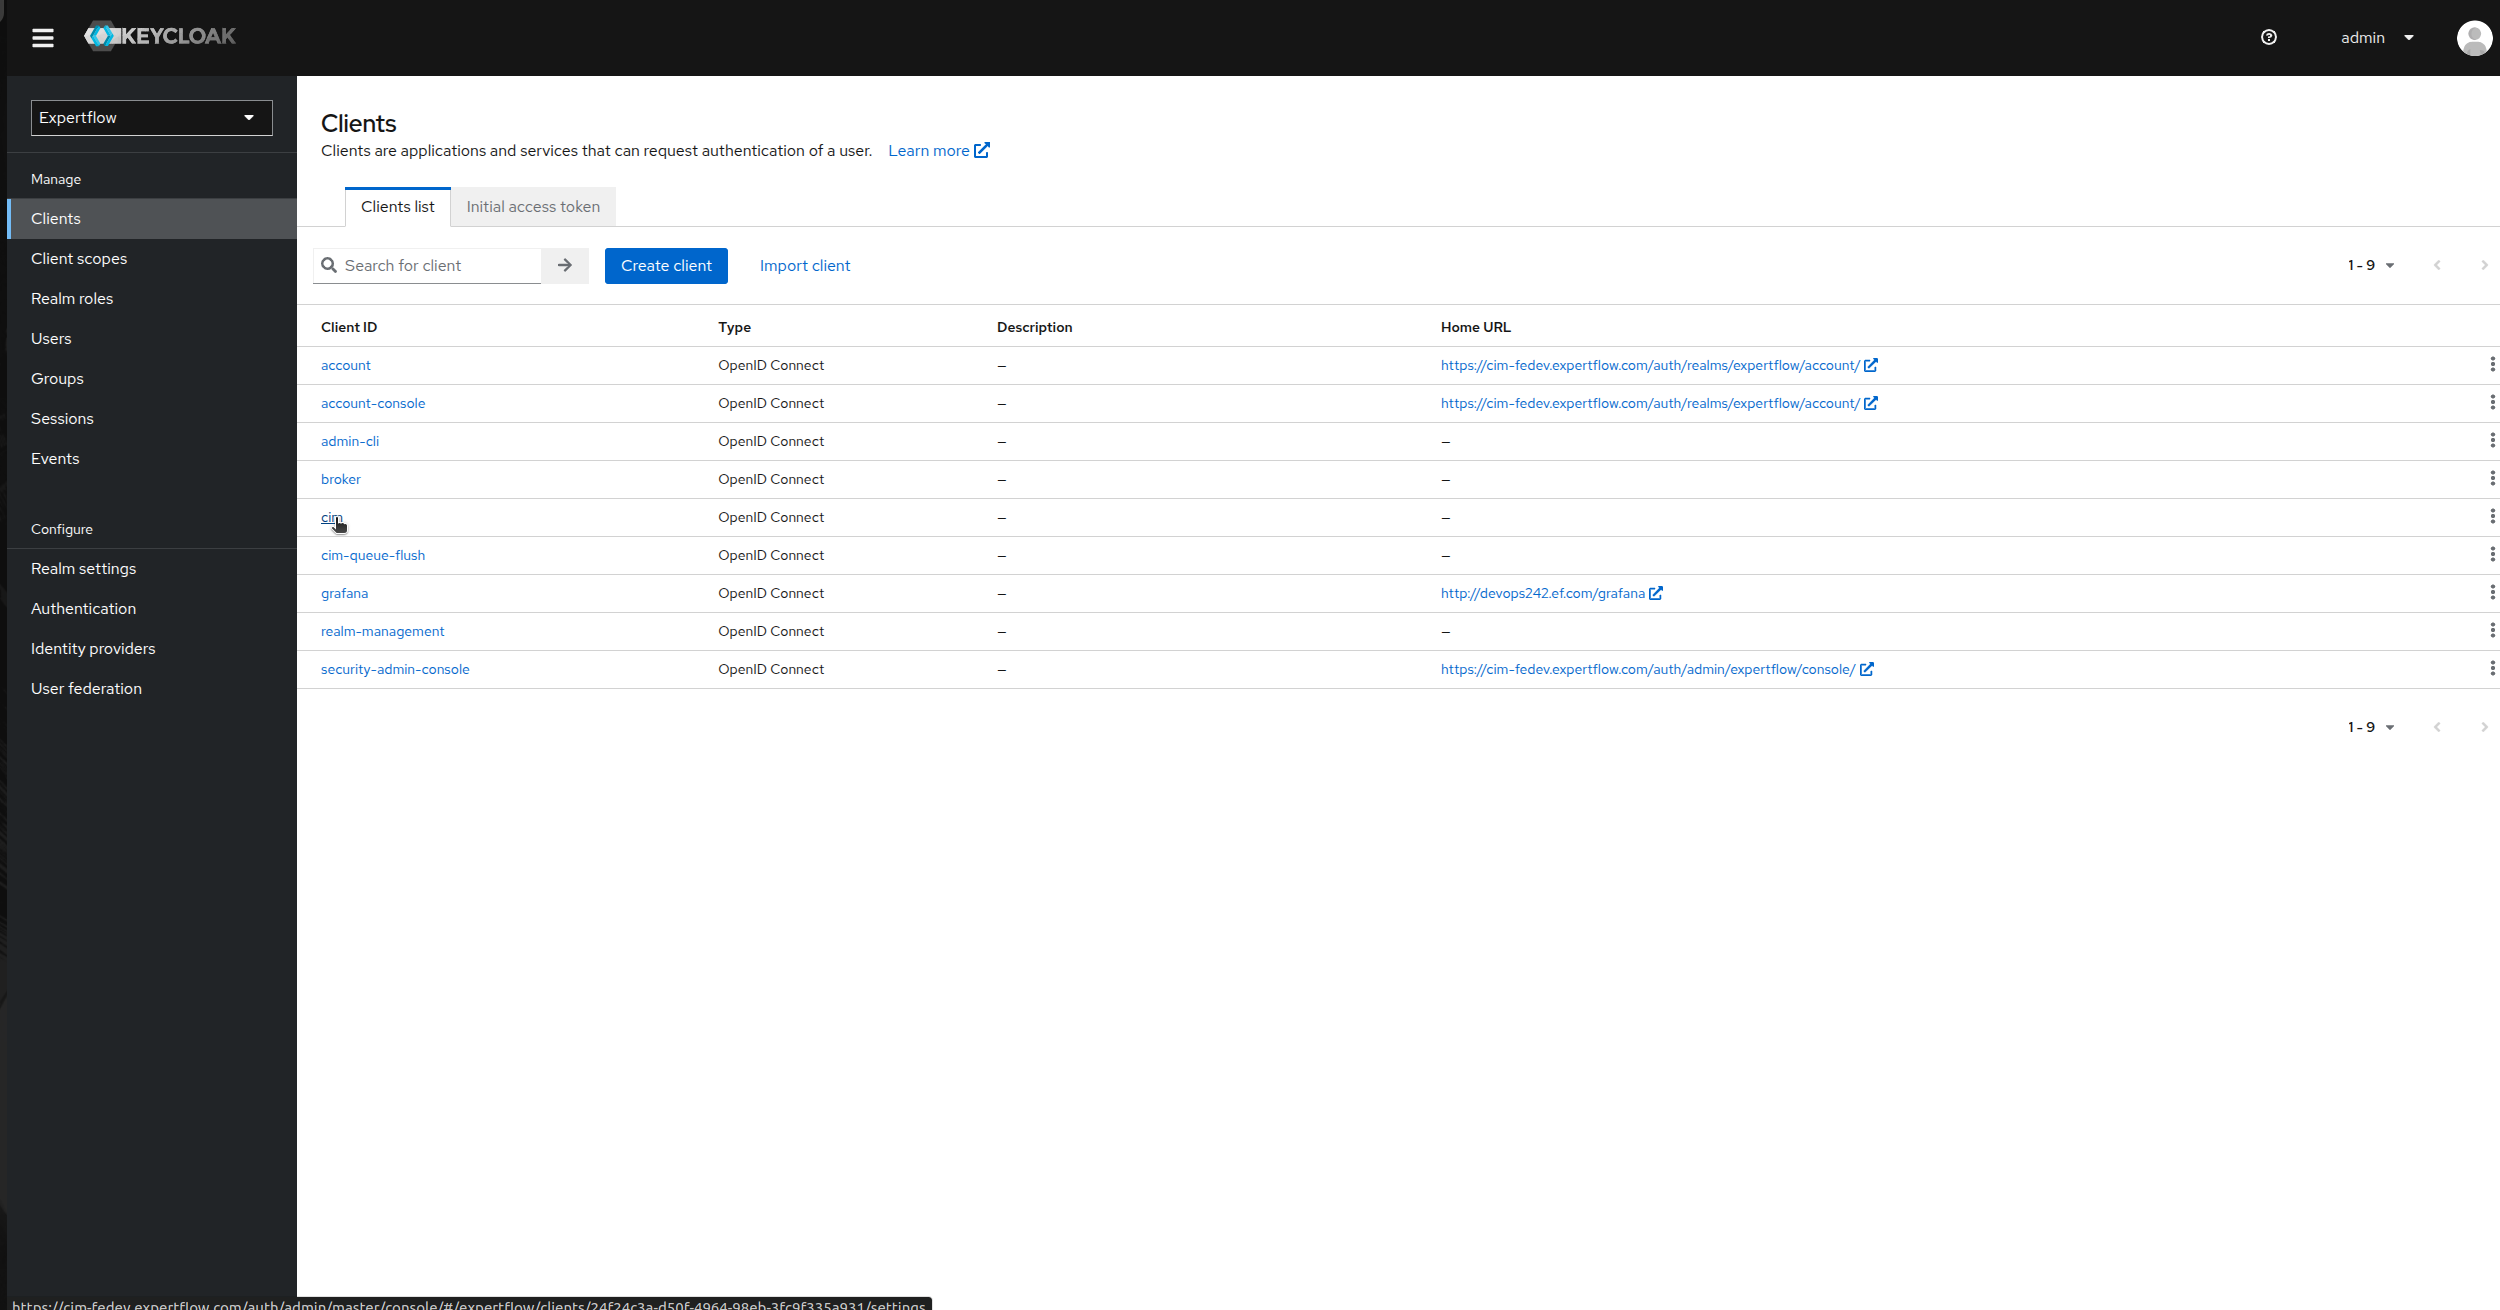
Then click on clients option in left panel and then select cim.
-
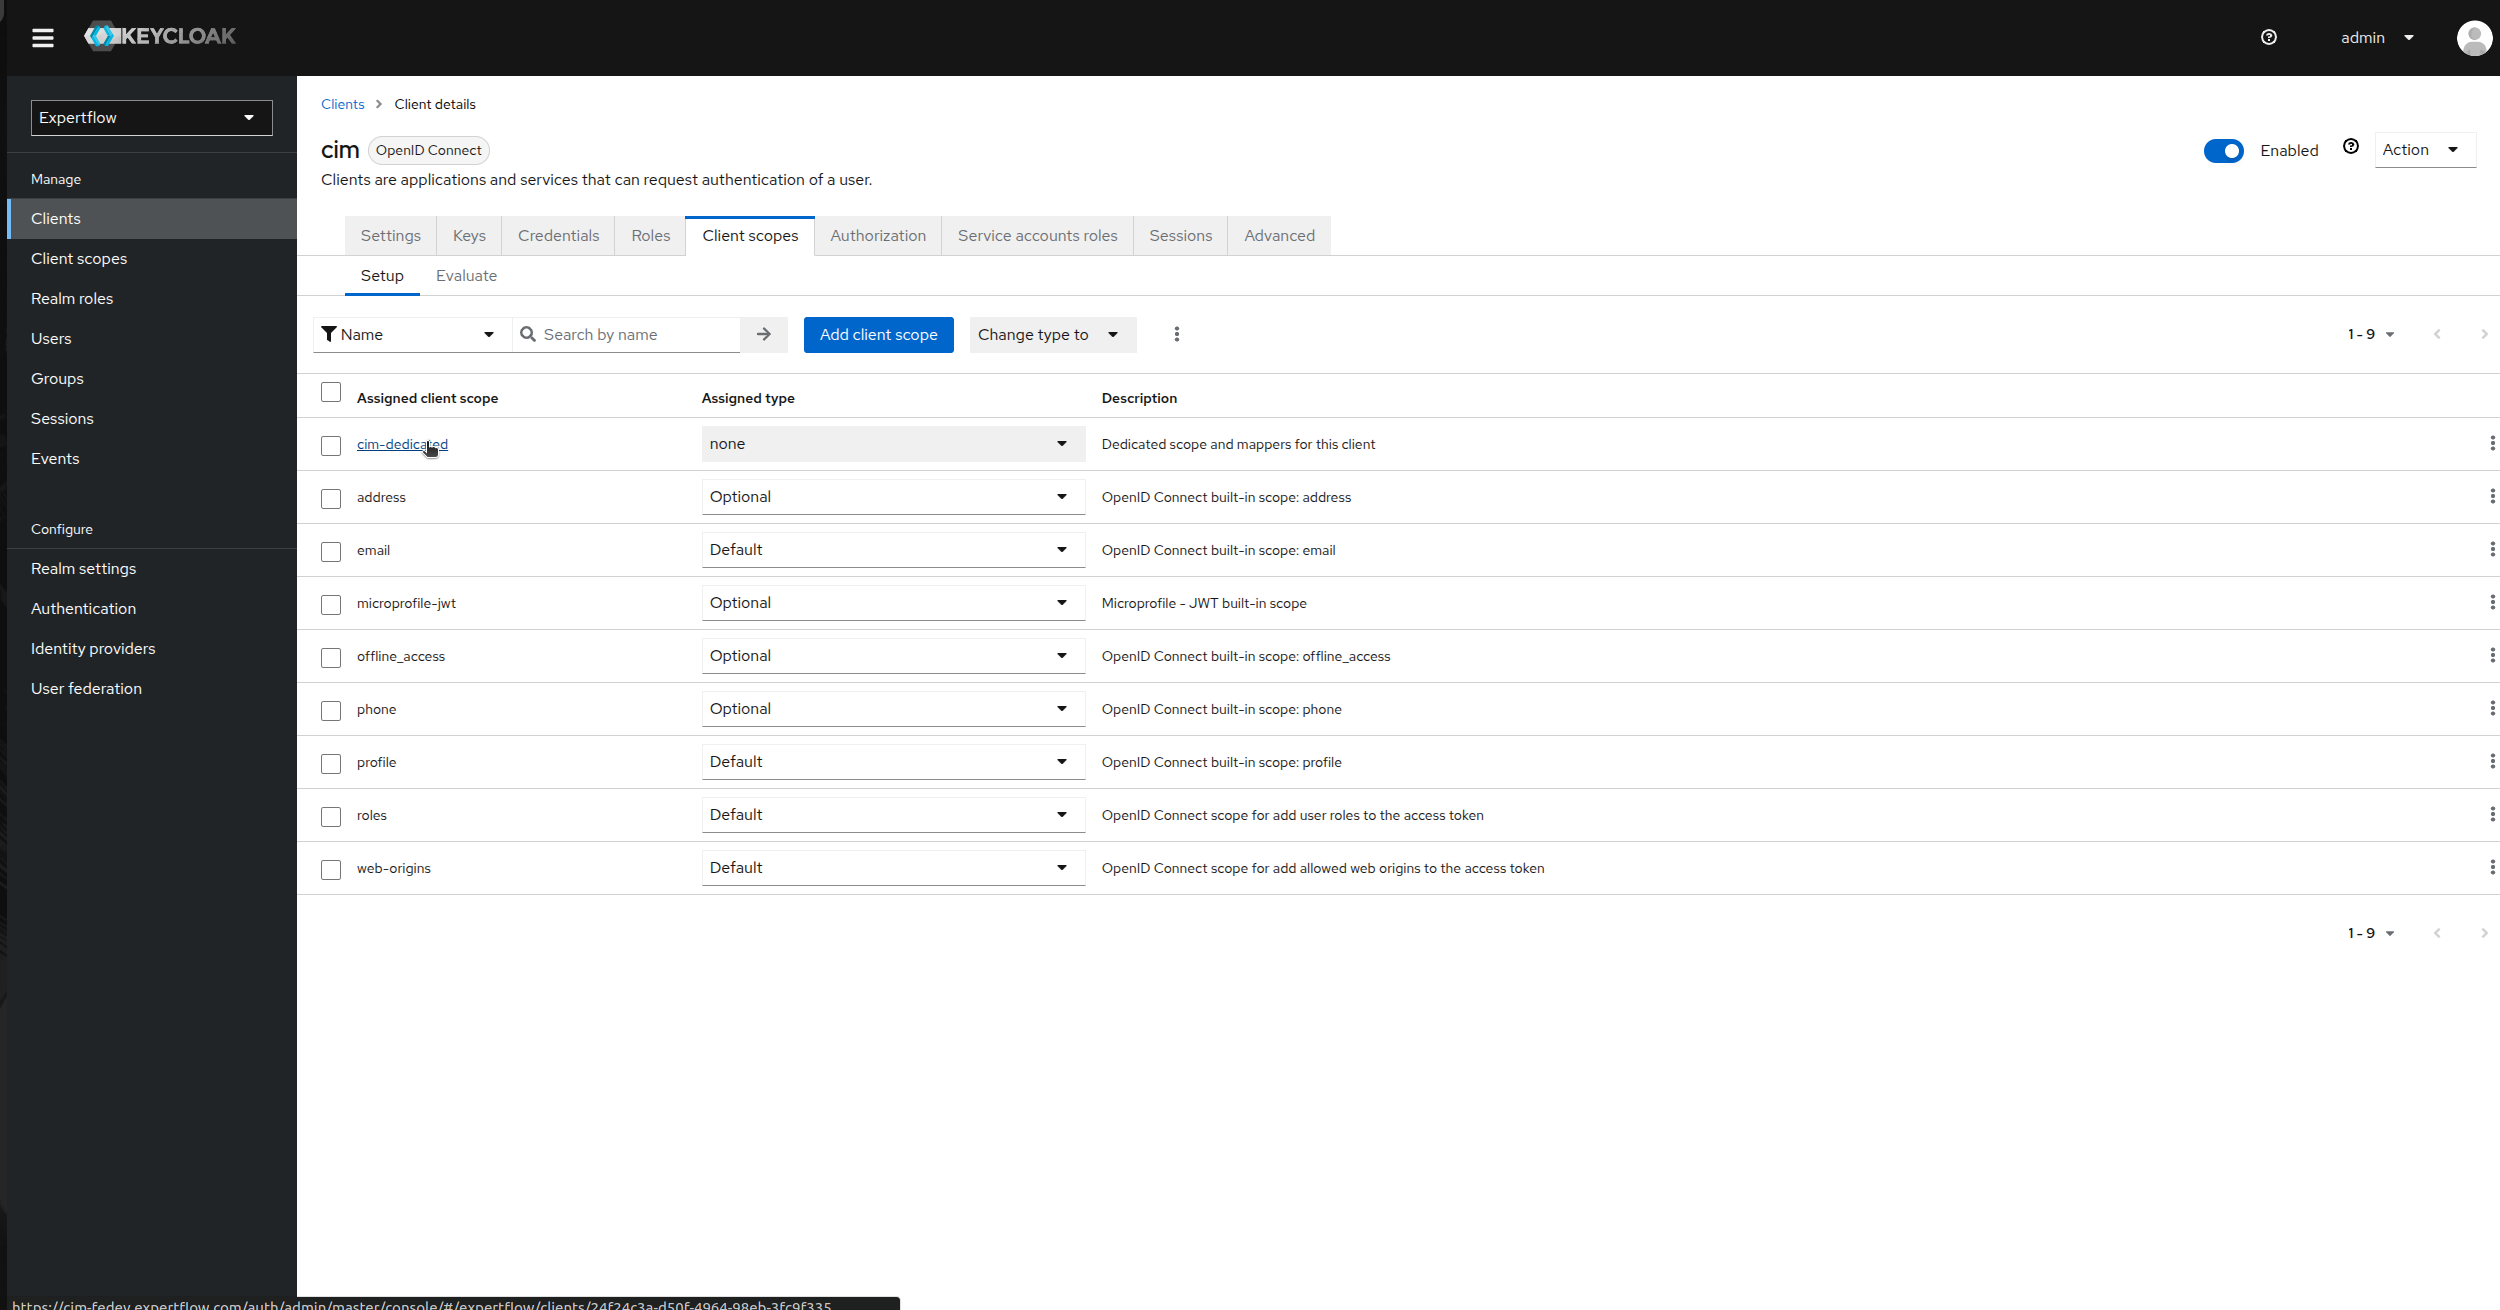
Now, go to the client scopes and click on cim-dedicated under Assigned client scope.
-
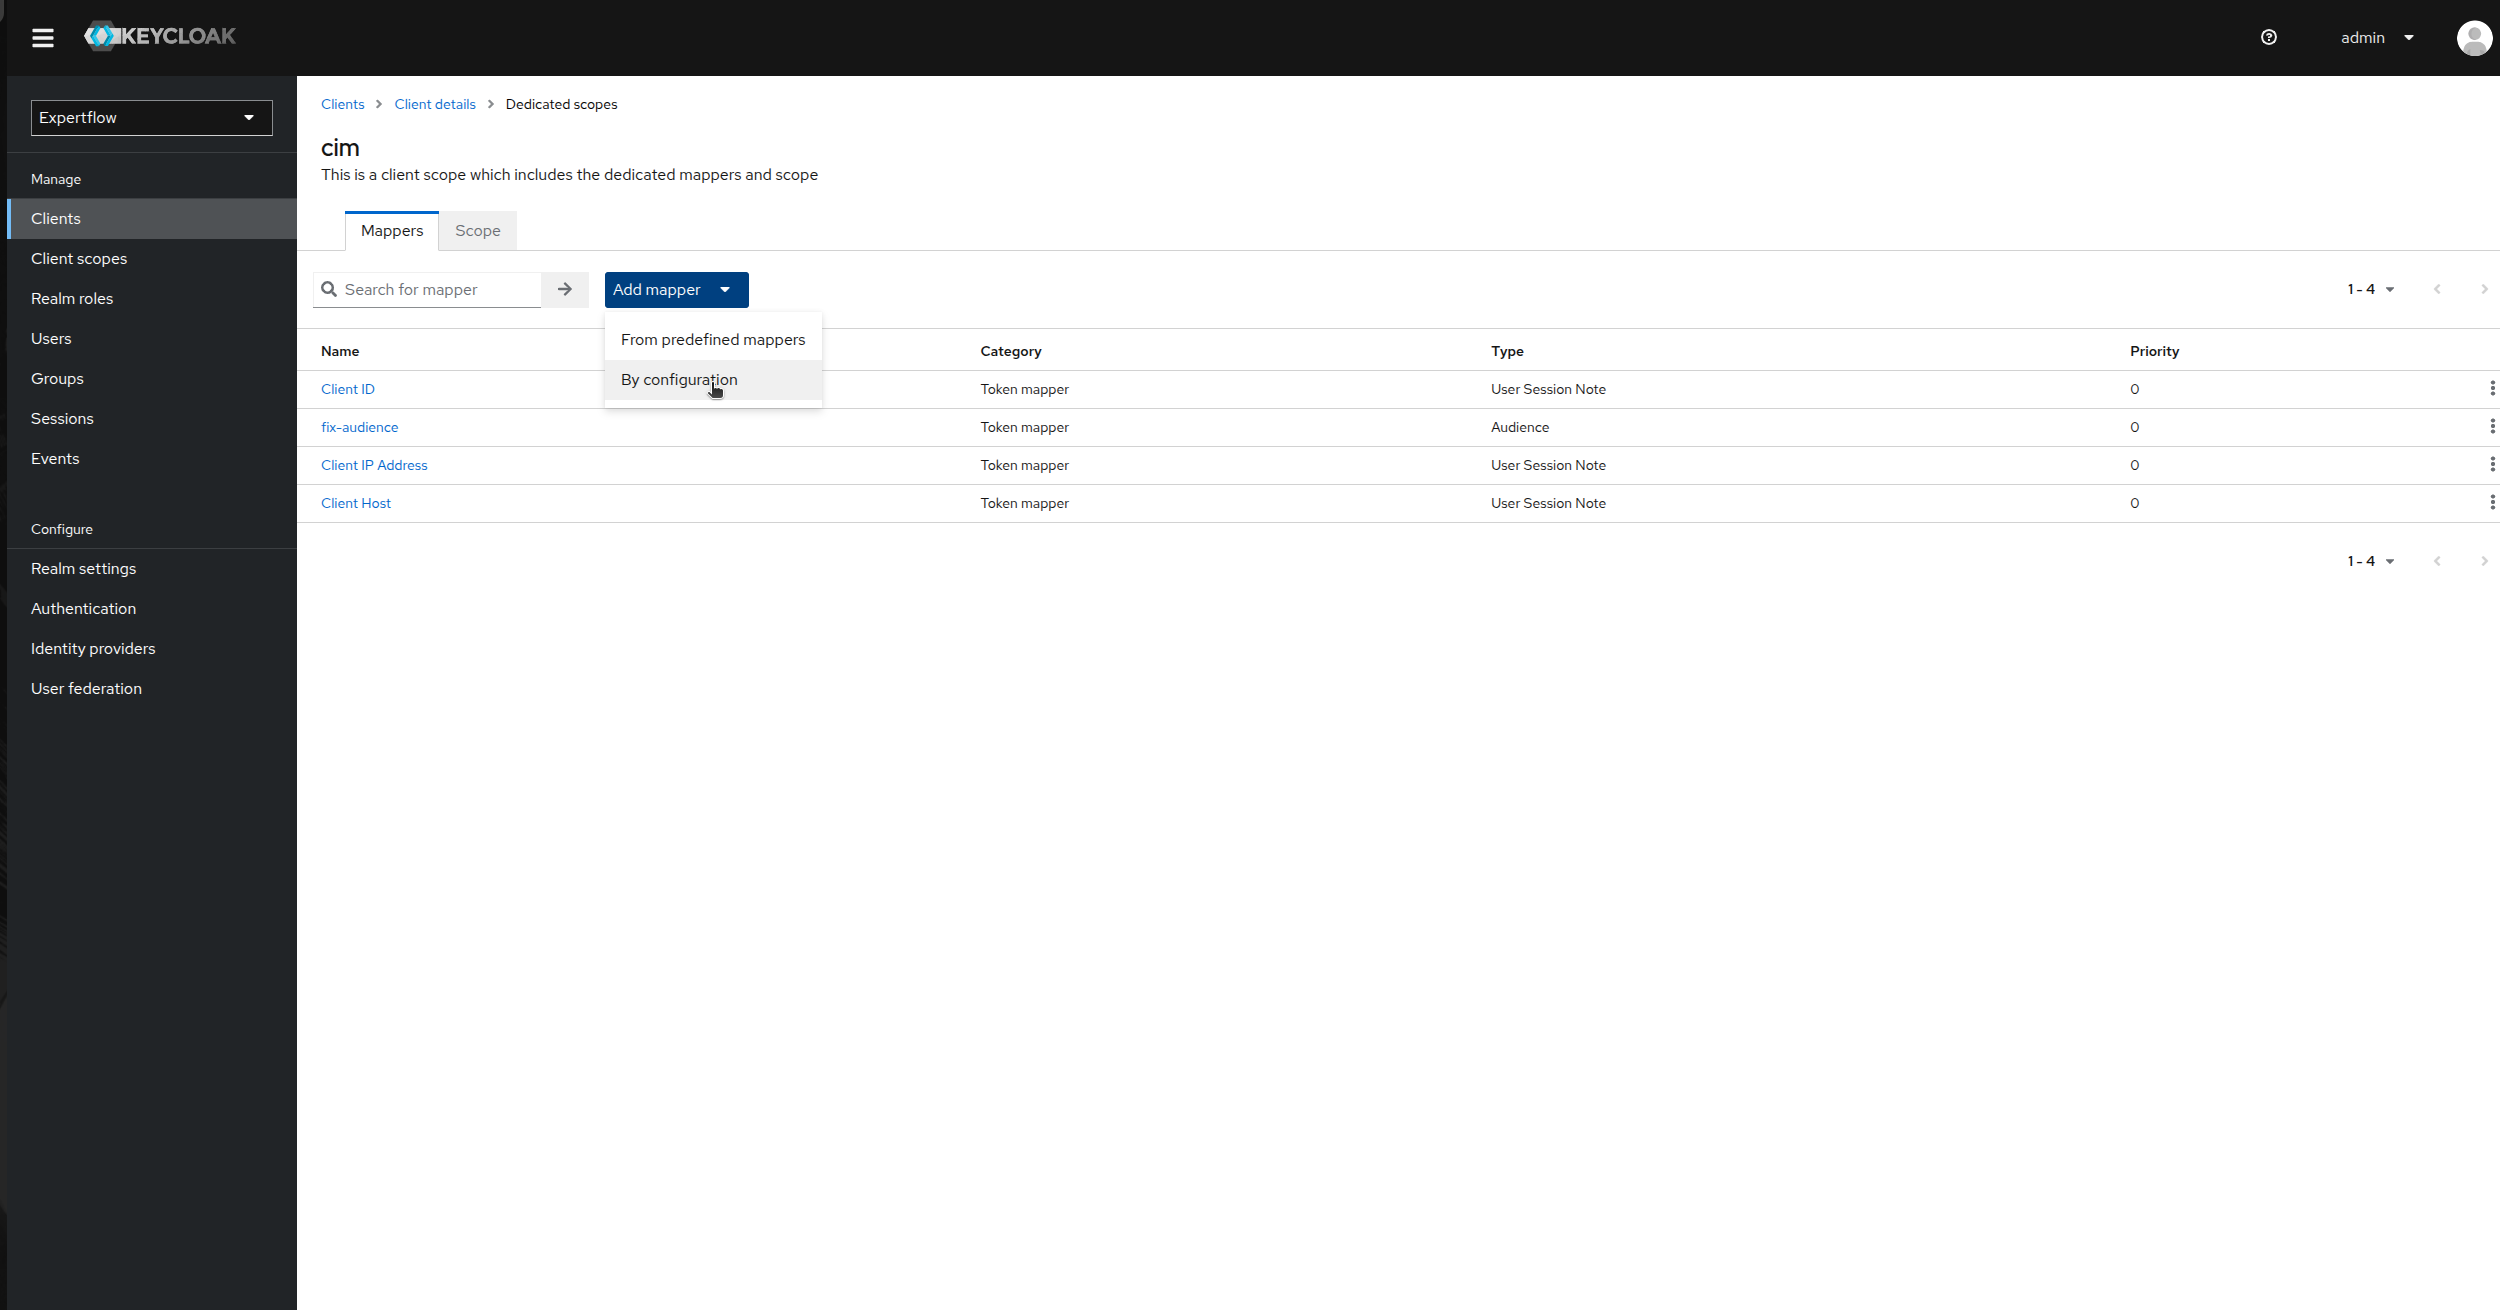
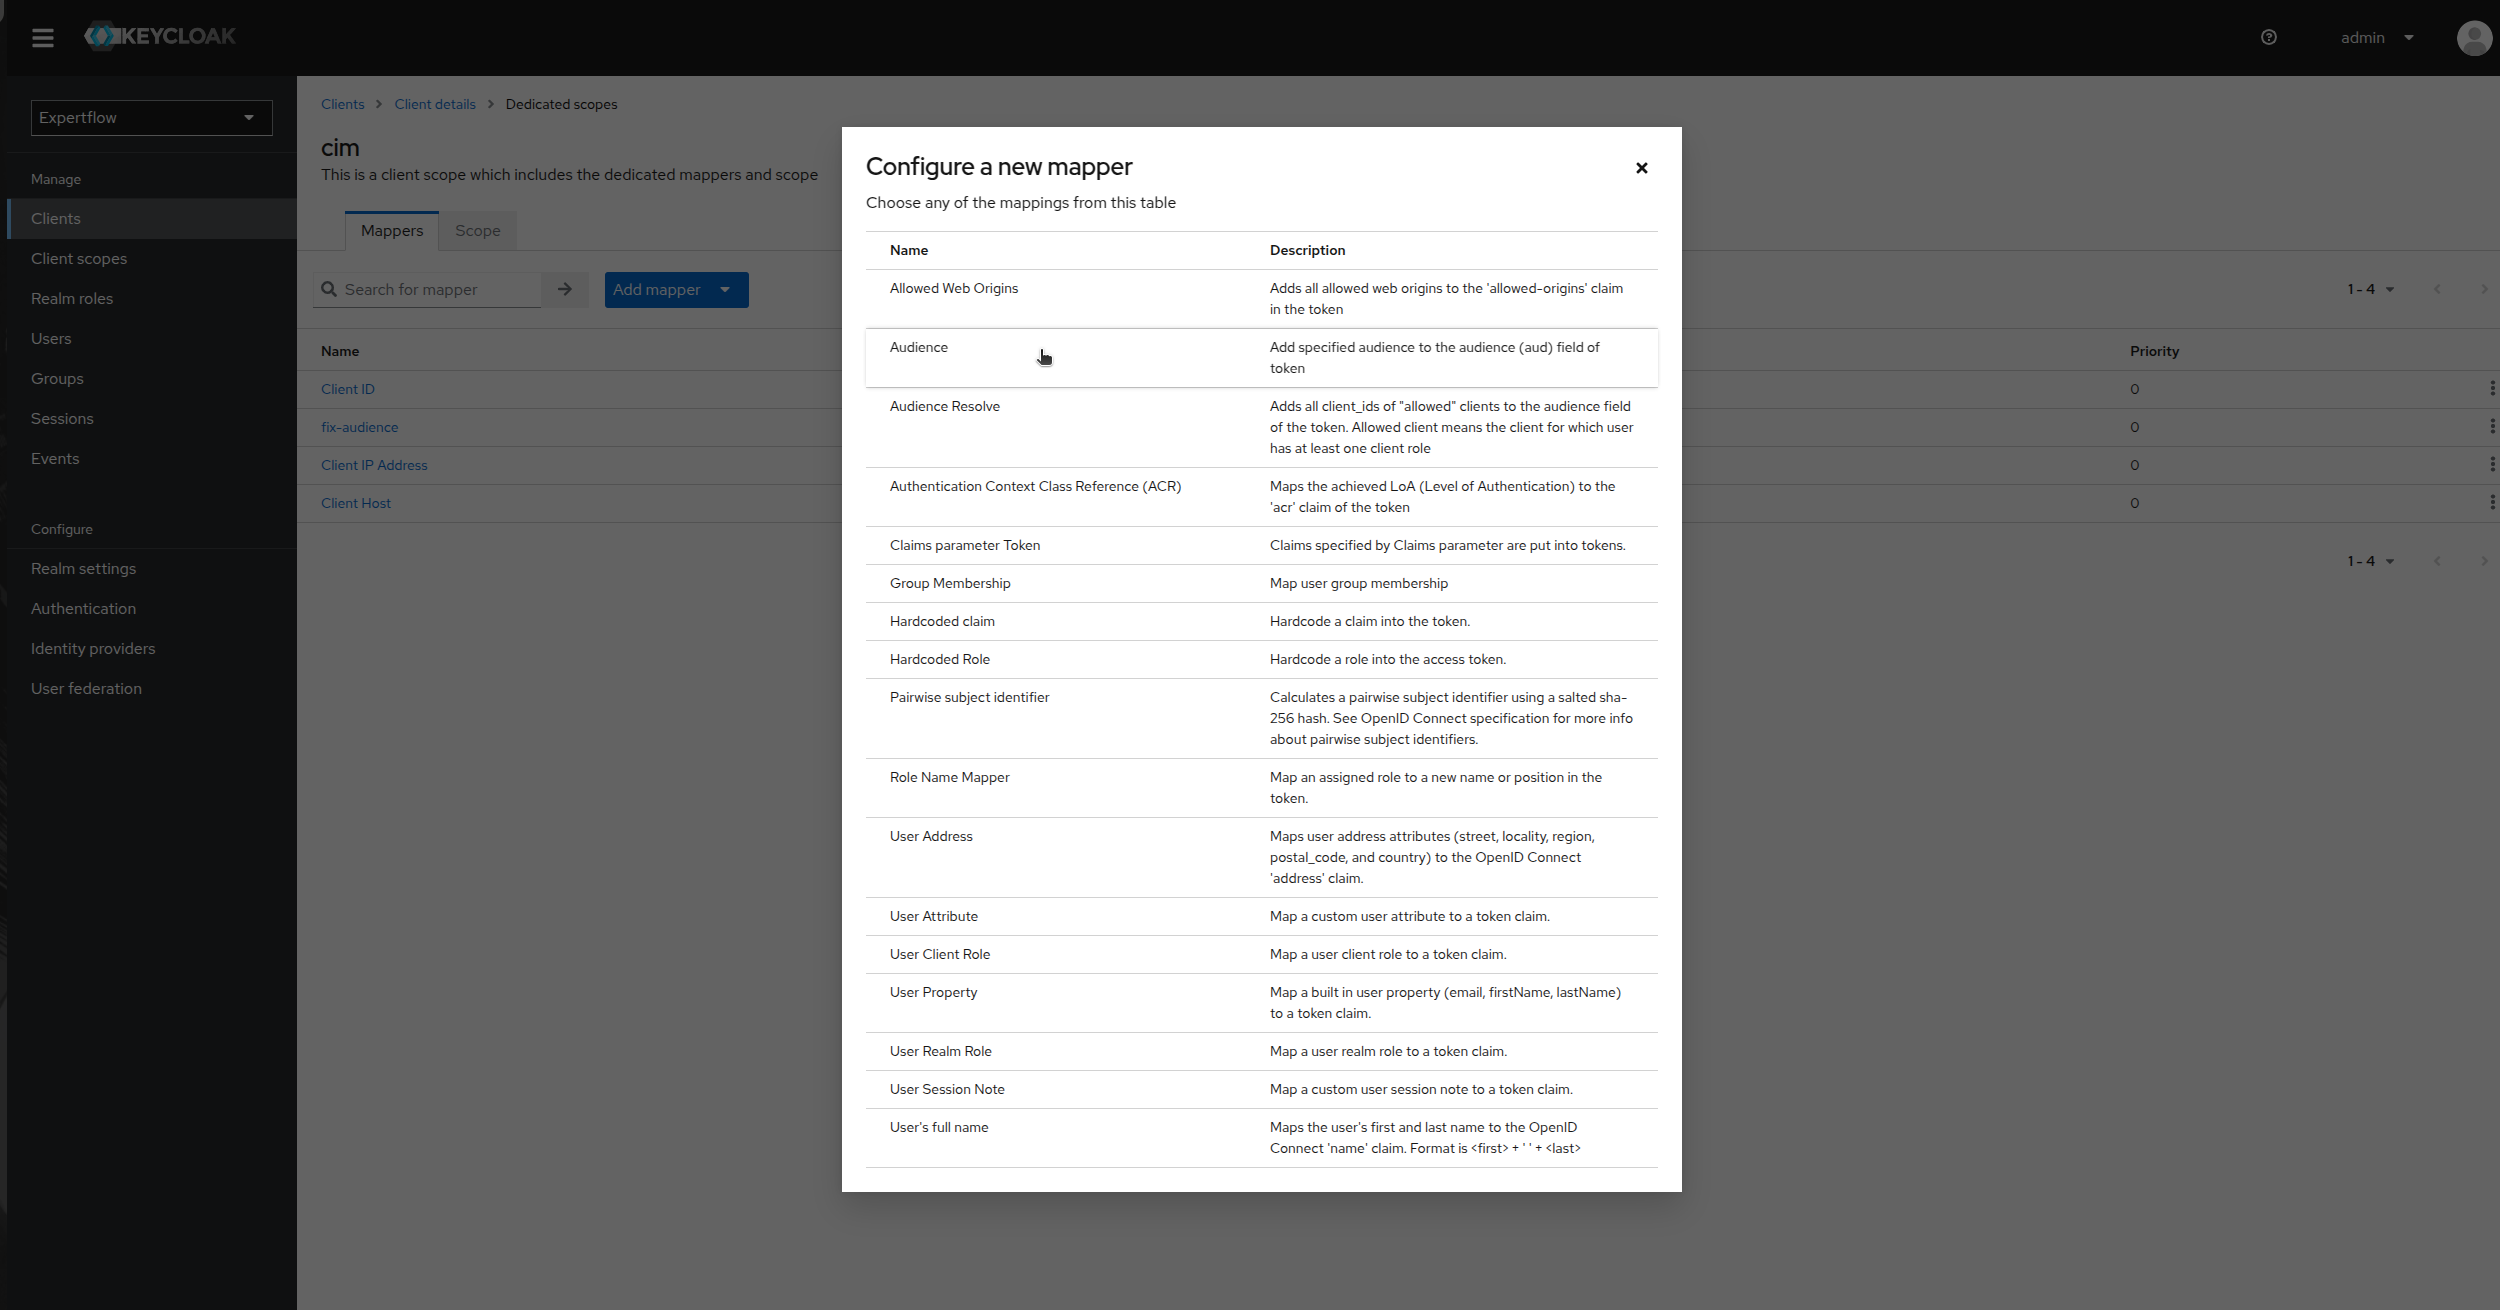
Click on Add Mapper and then select By configuration.
-
Click on Audience.
-
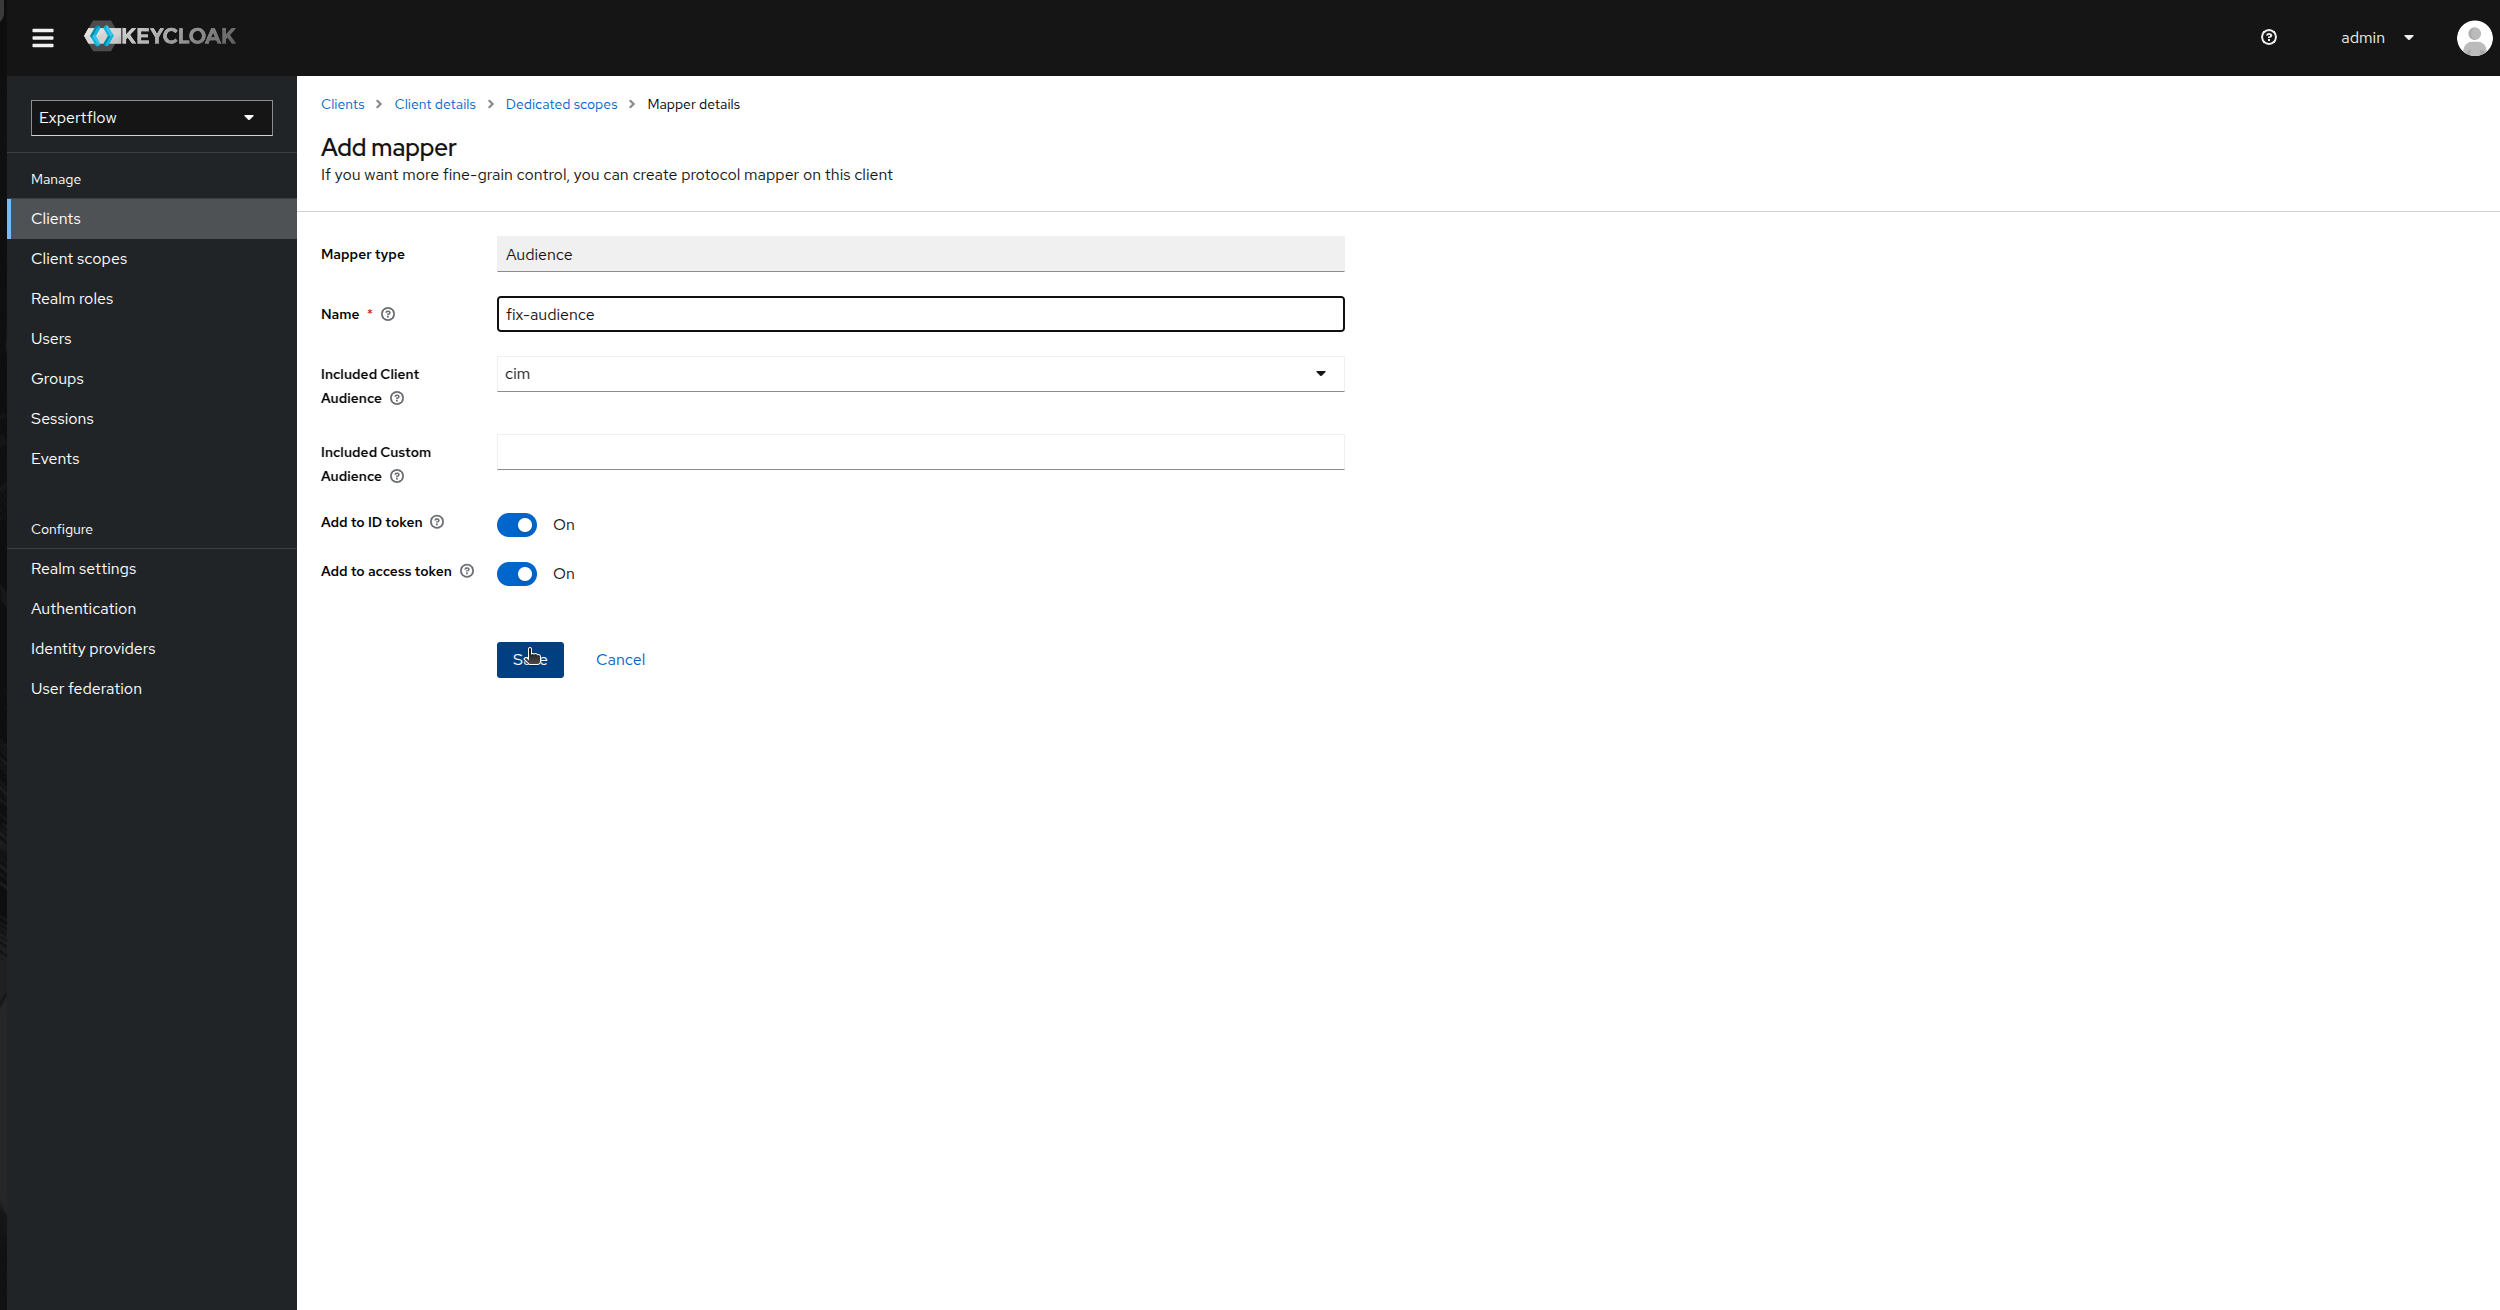
Provide Name as “fix-audience”, select cim in Included Client Audience. Check “Add to ID Token” toggle as On and Save.
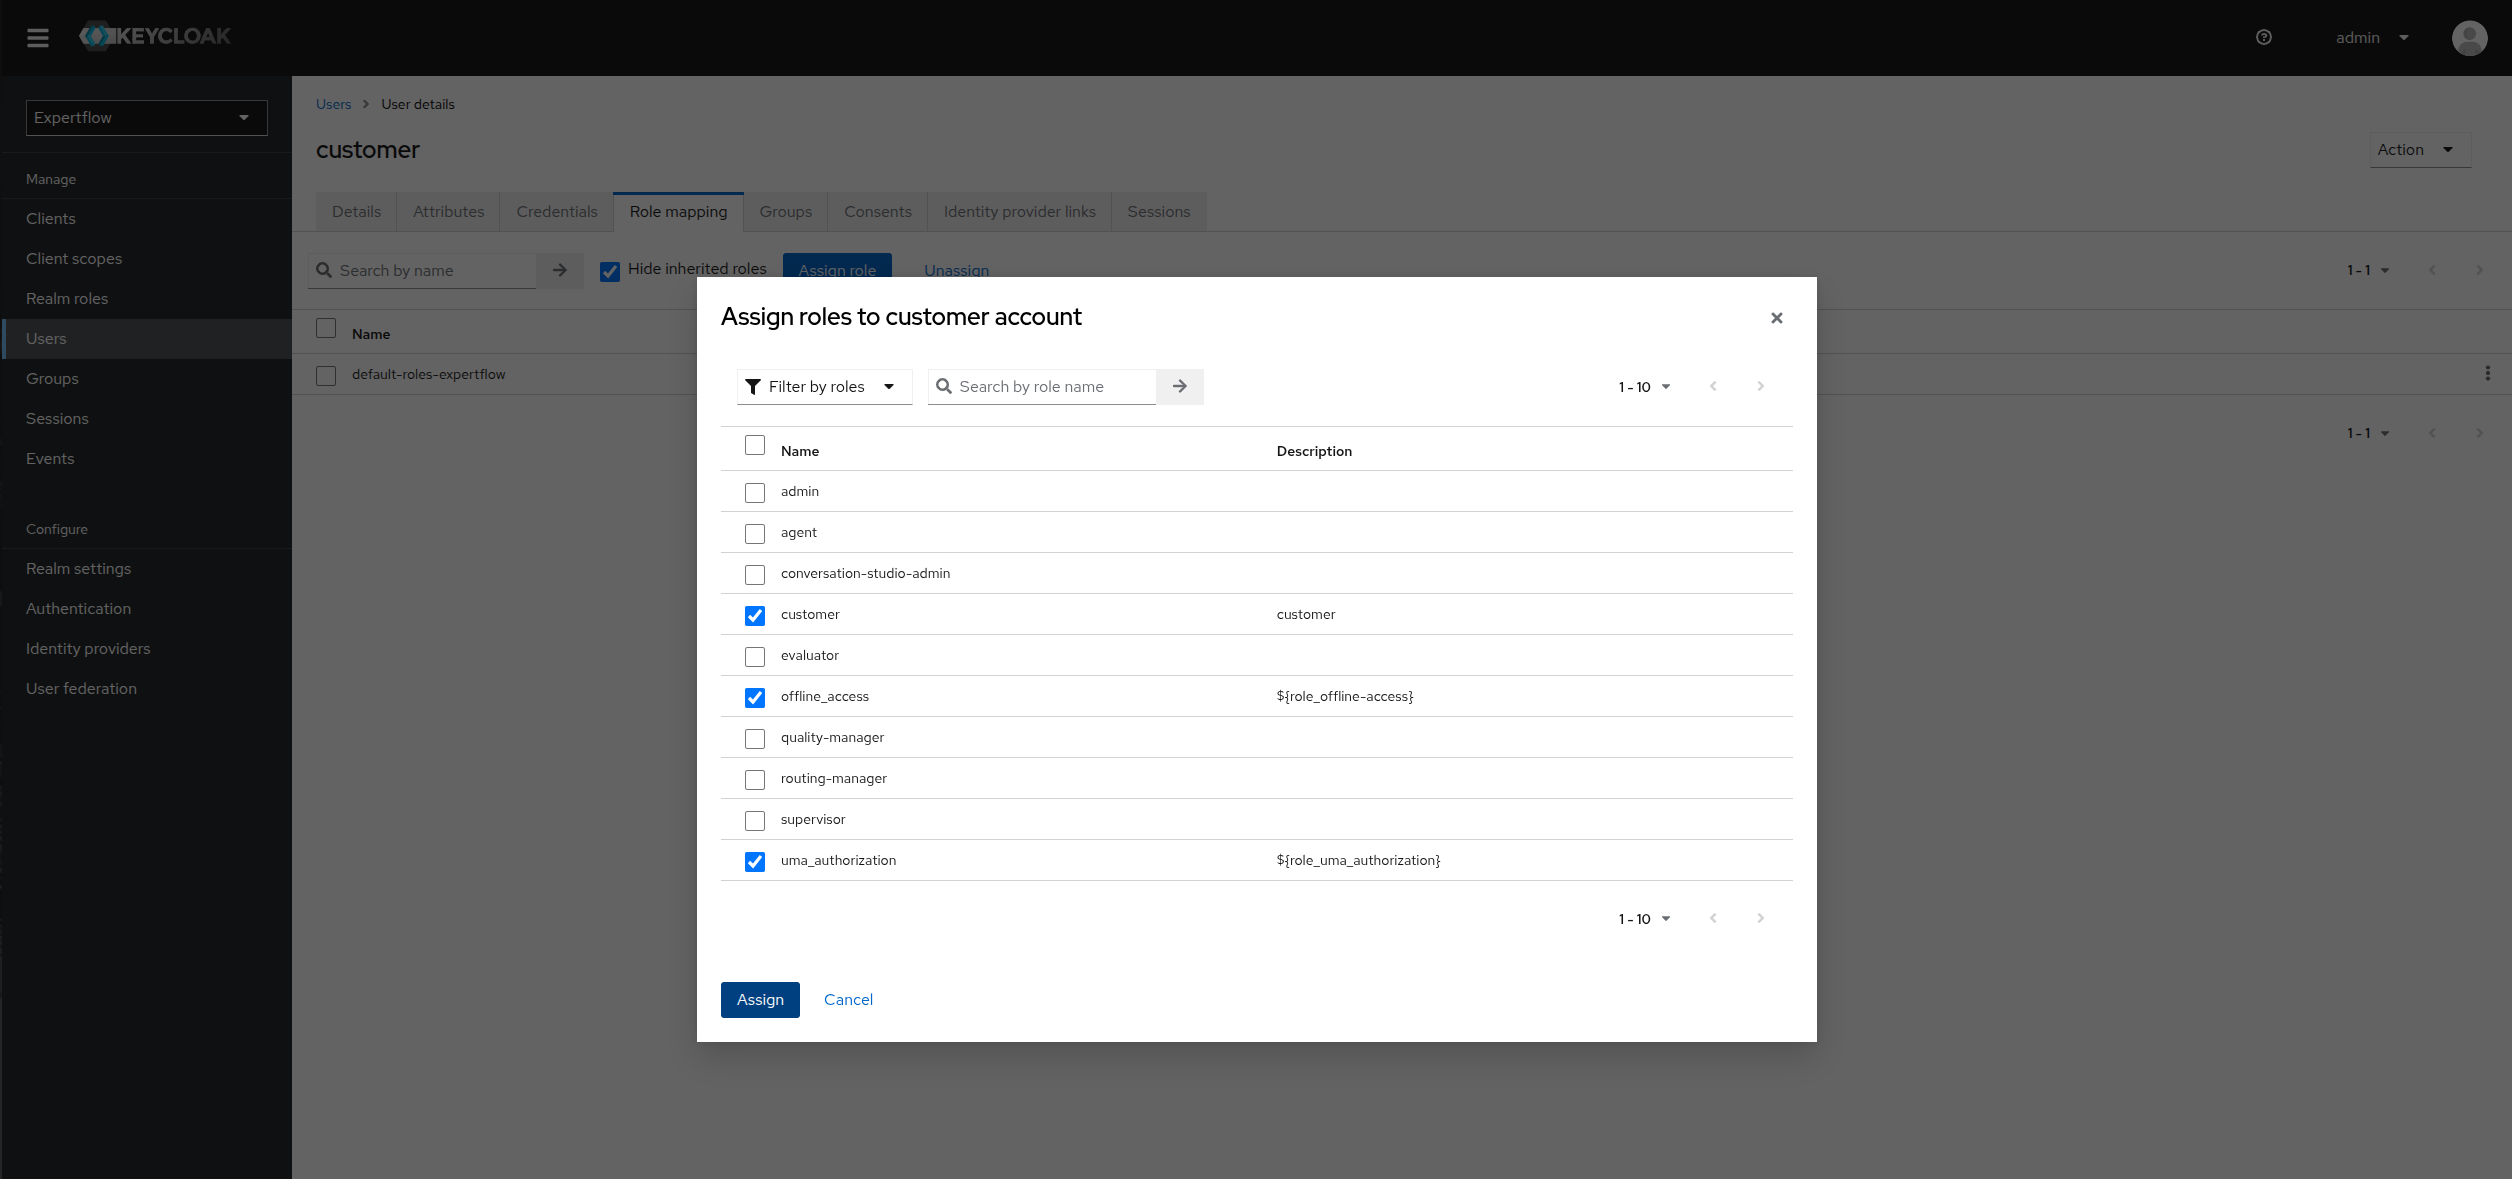
Create a Customer User:
This user is responsible for creation of Access Token for each customer in Customer Widget.
-
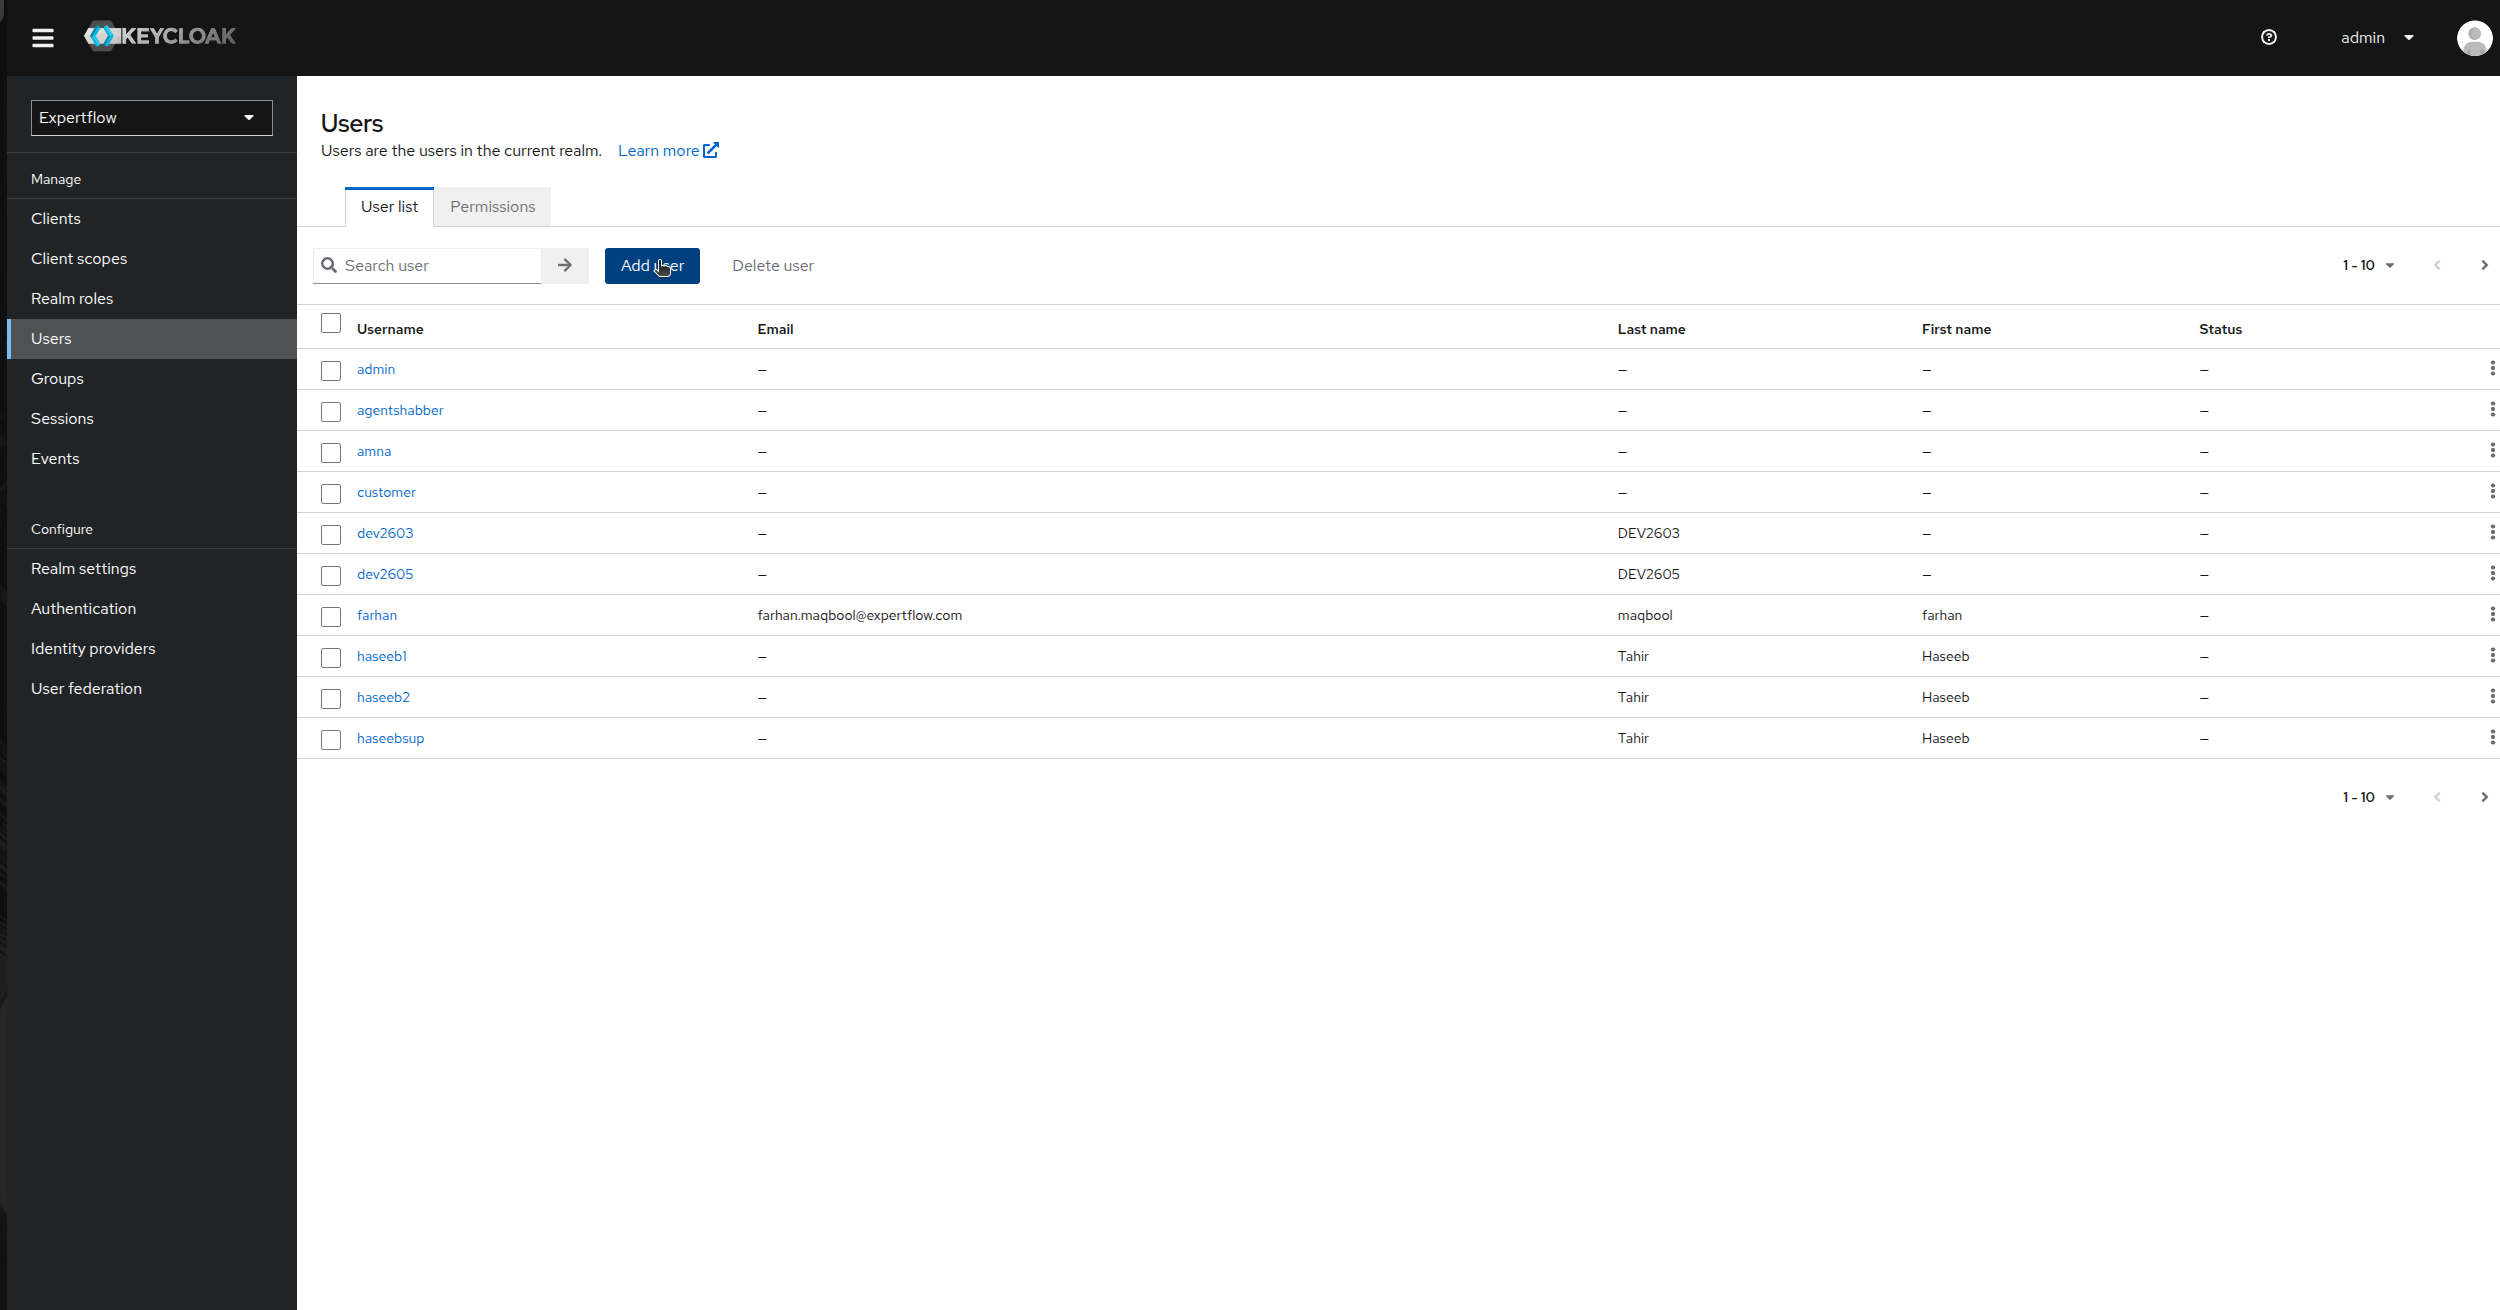
Go to the Users tab in left Control Panel.
-
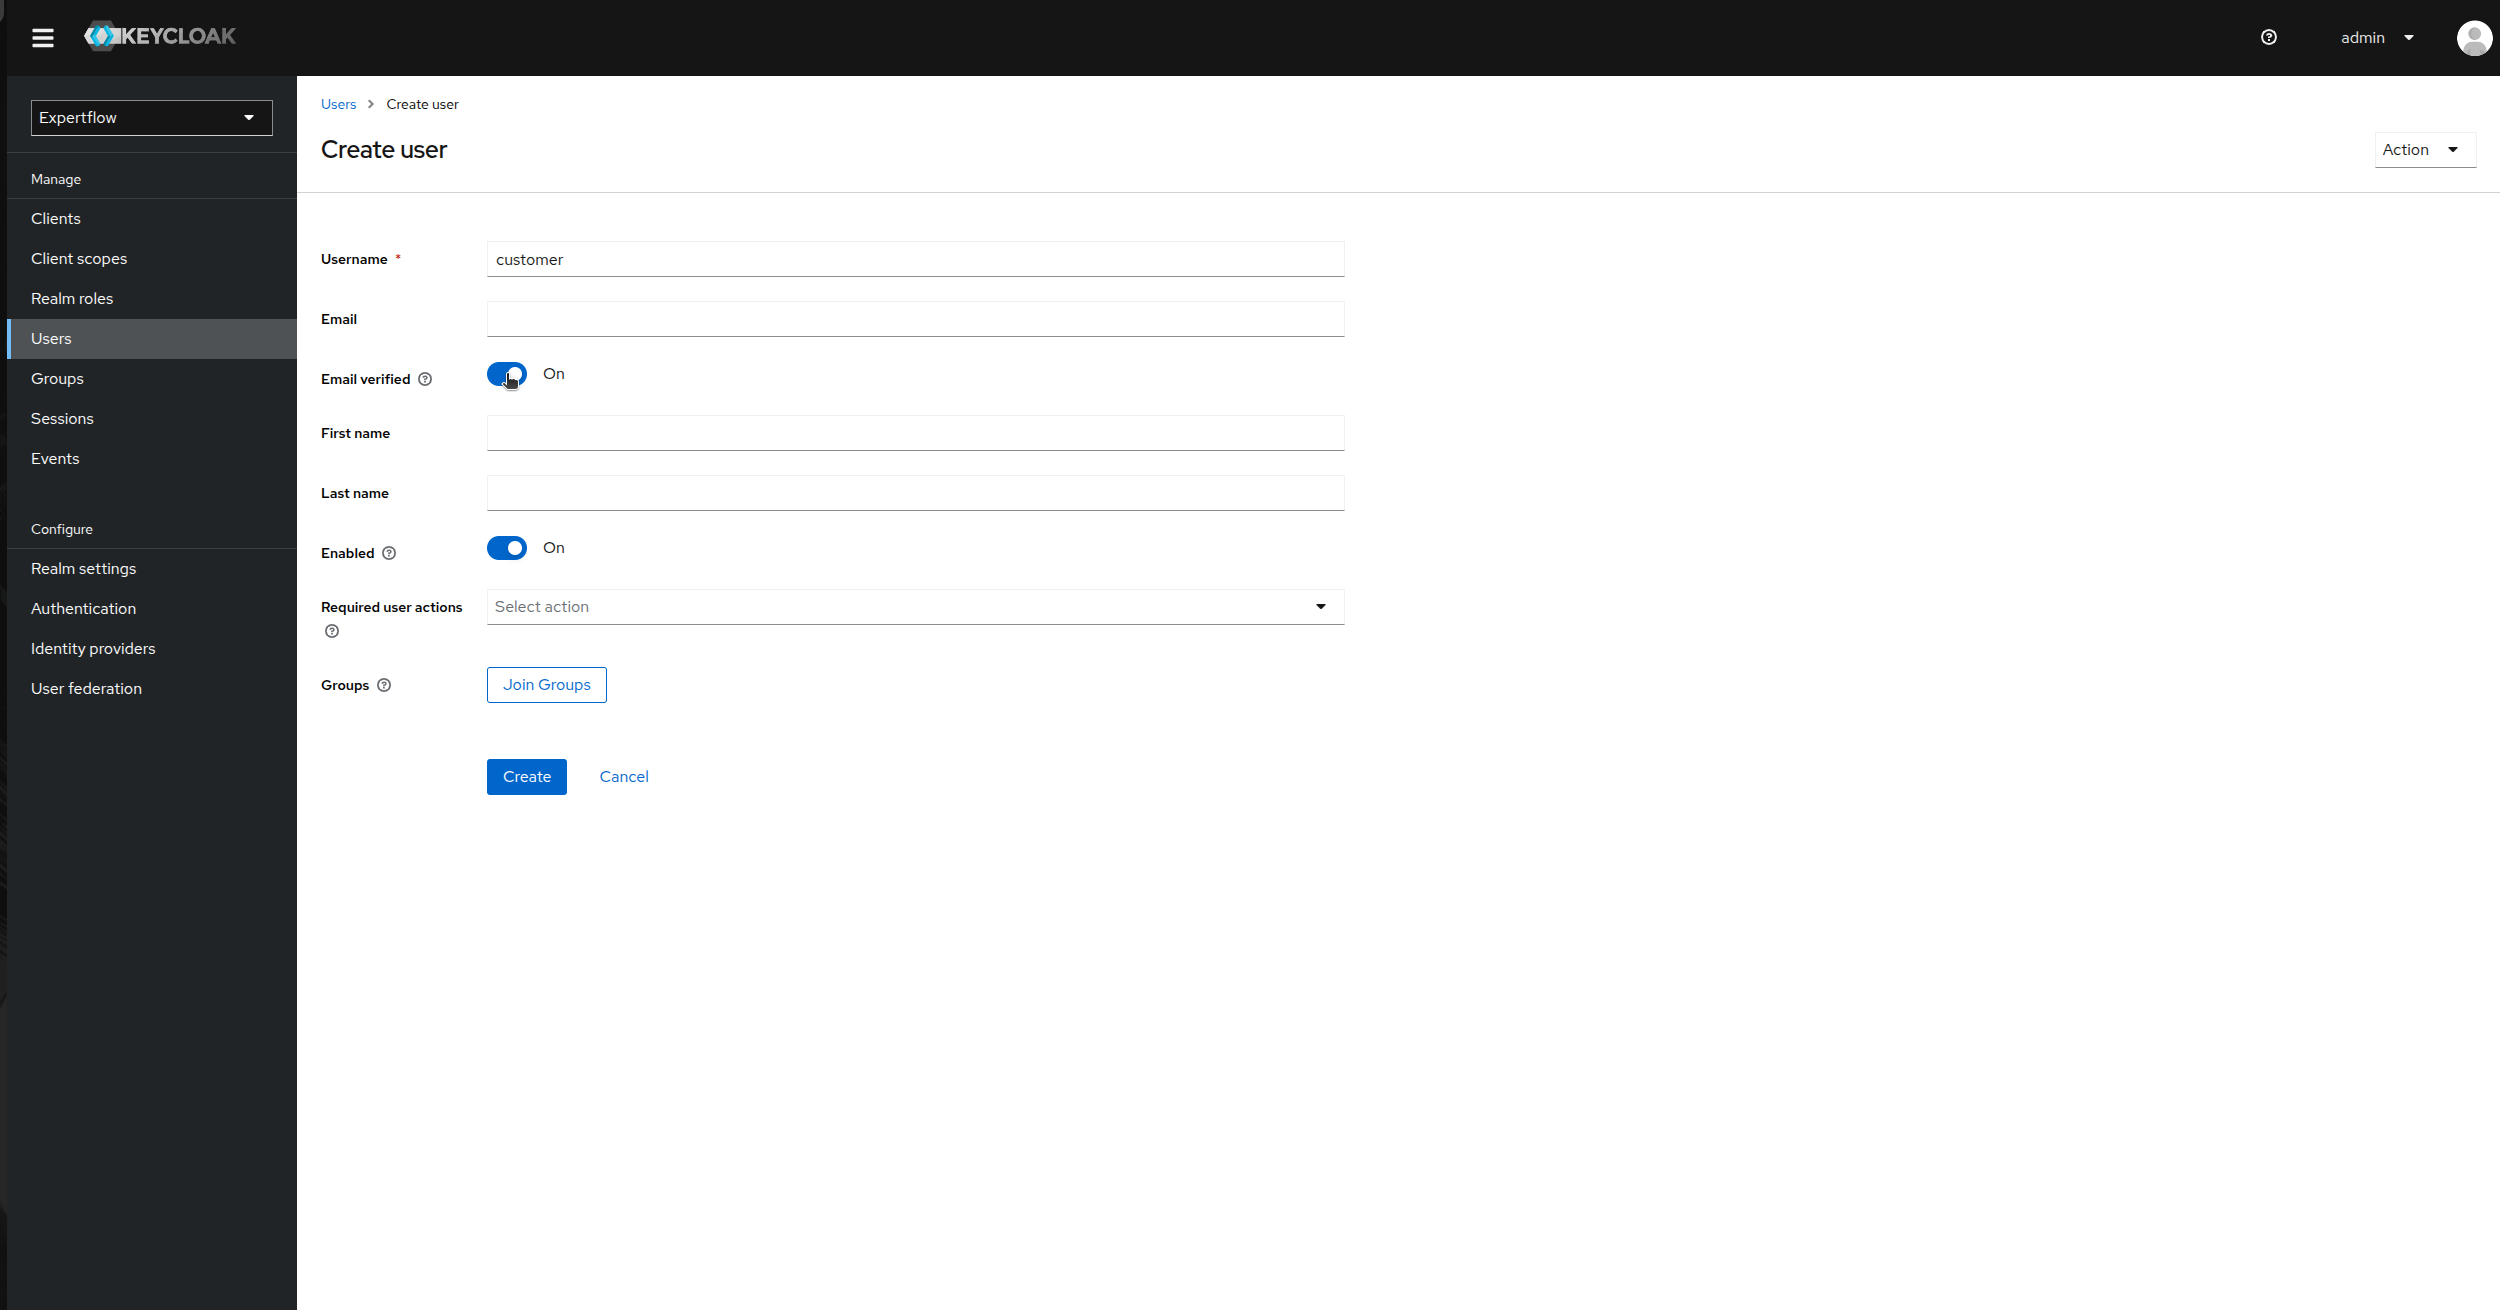
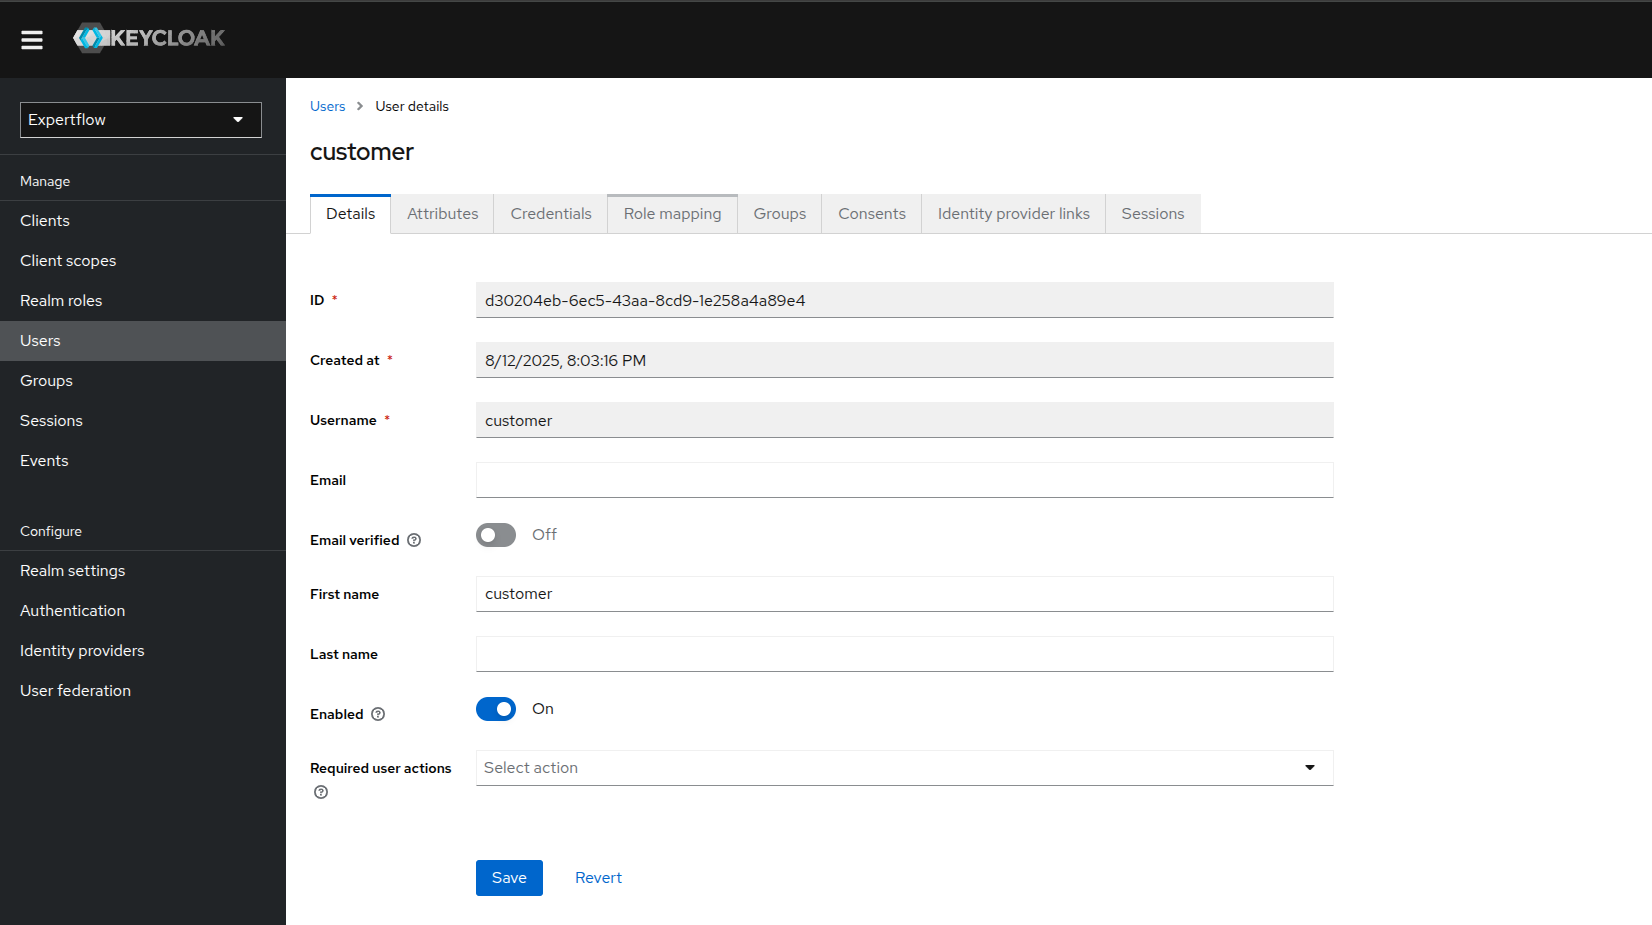
Click on Add User and provide username as “customer” and enable Email Verified toggle to On and click save.
-
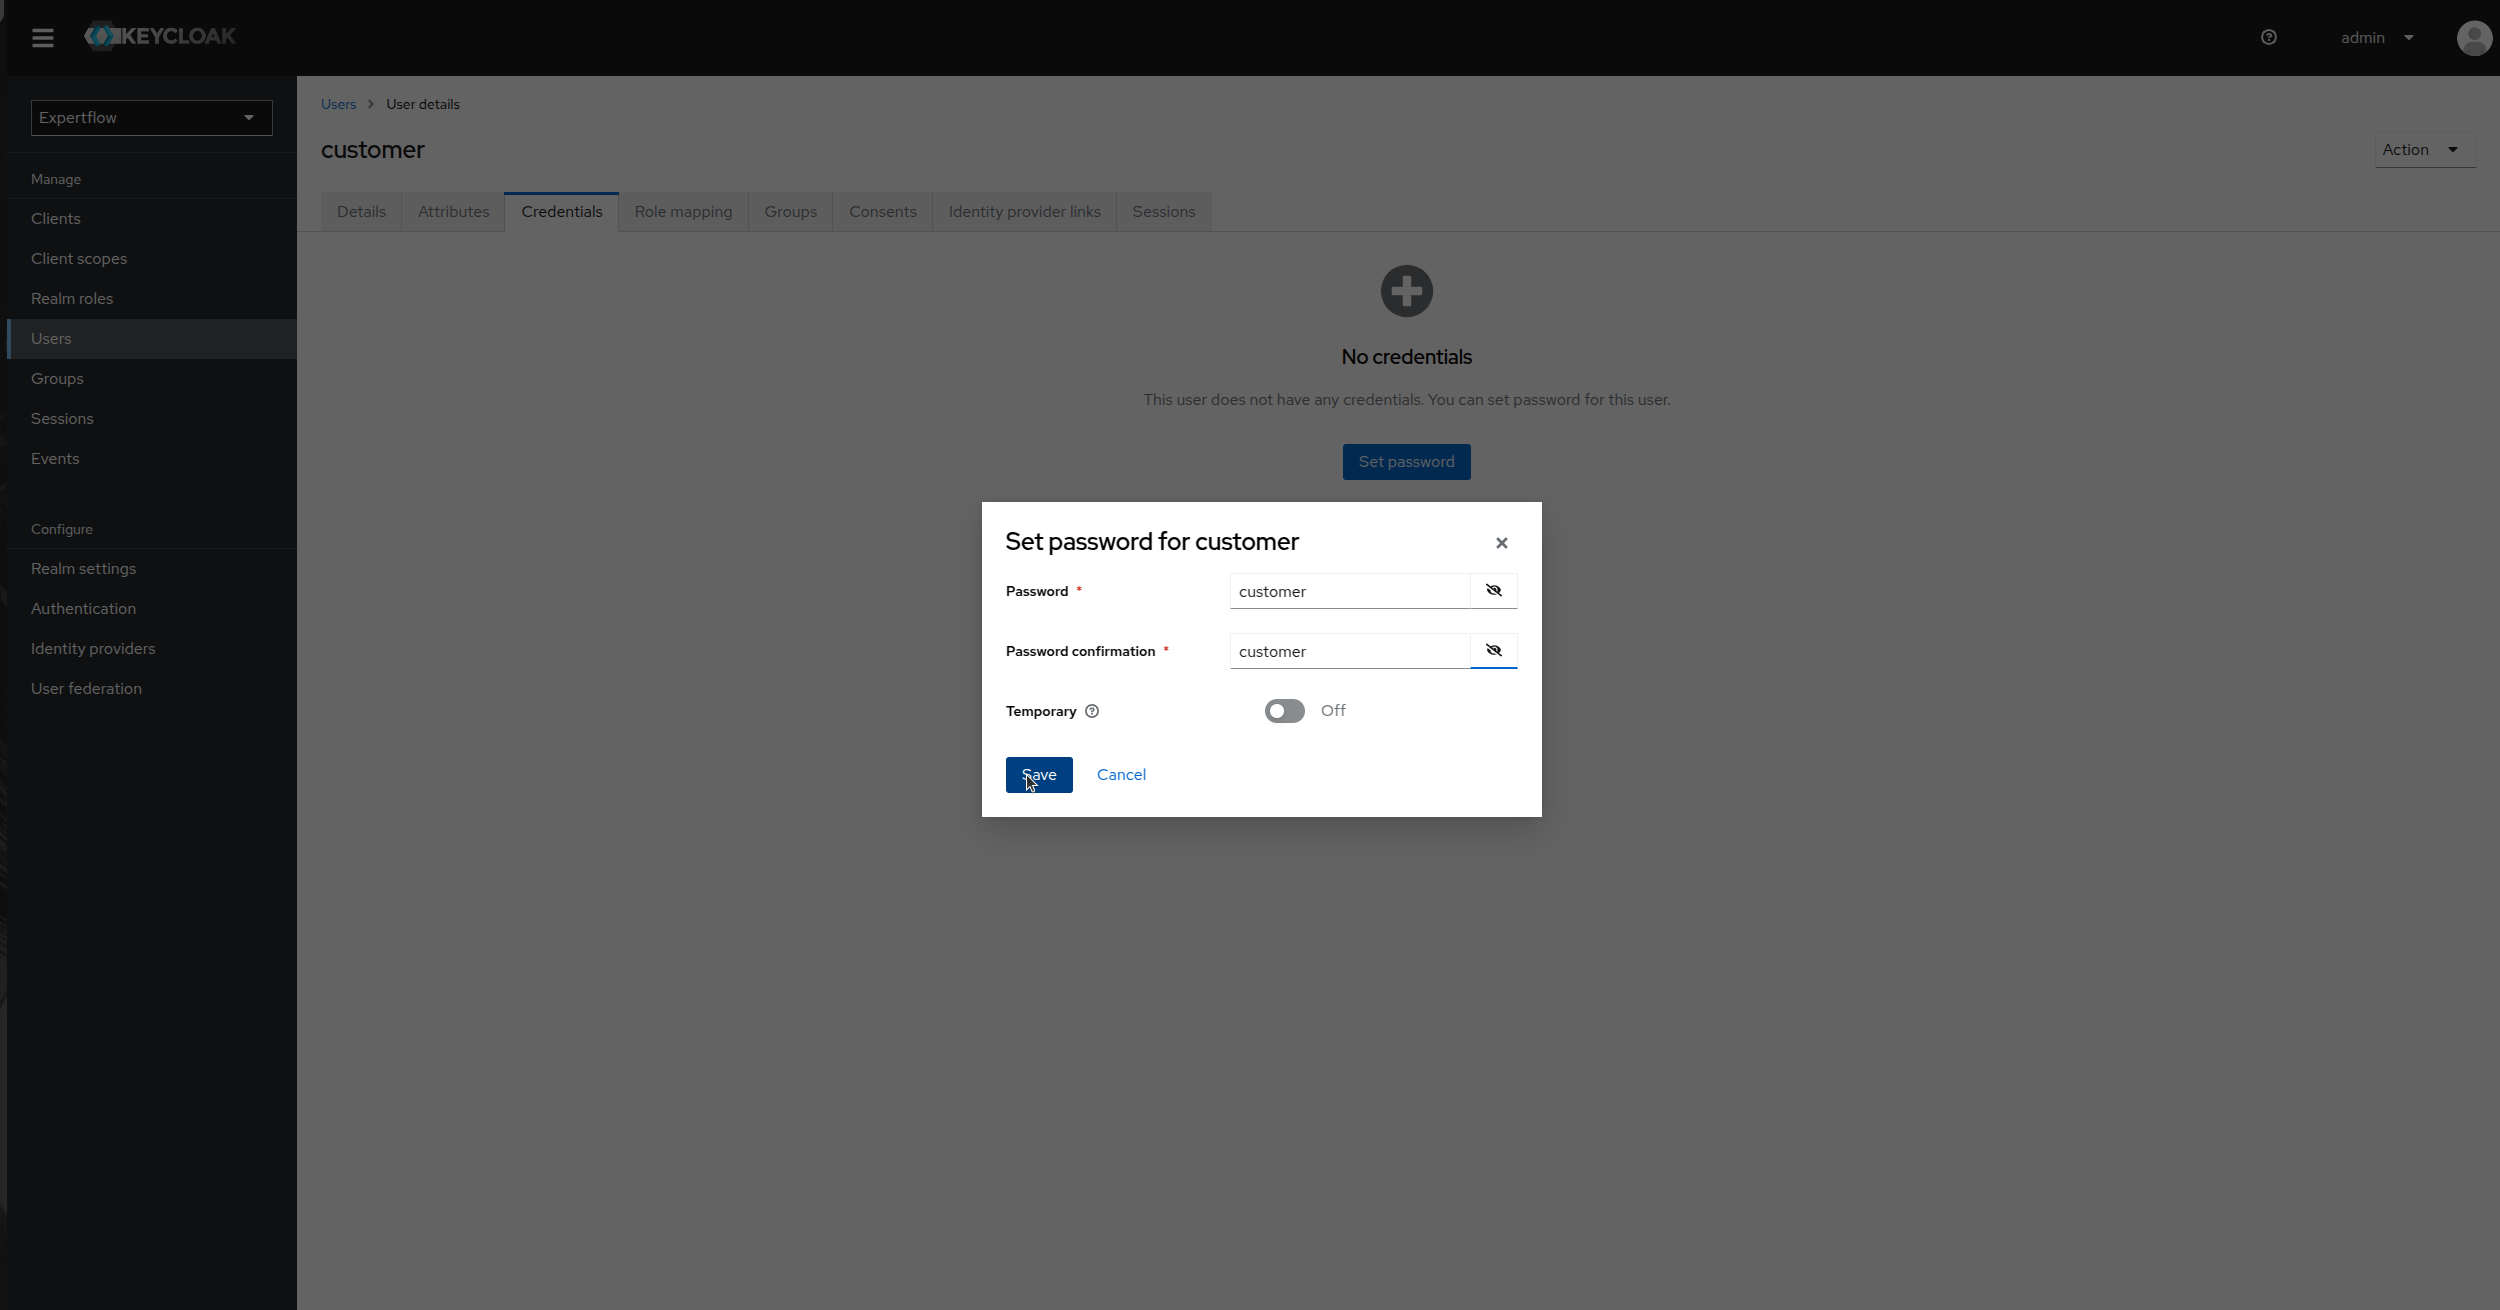
Once user is created, go to Credentials and click on Set Password, provide credentials as customer and toggle temporary to false. Click save
-
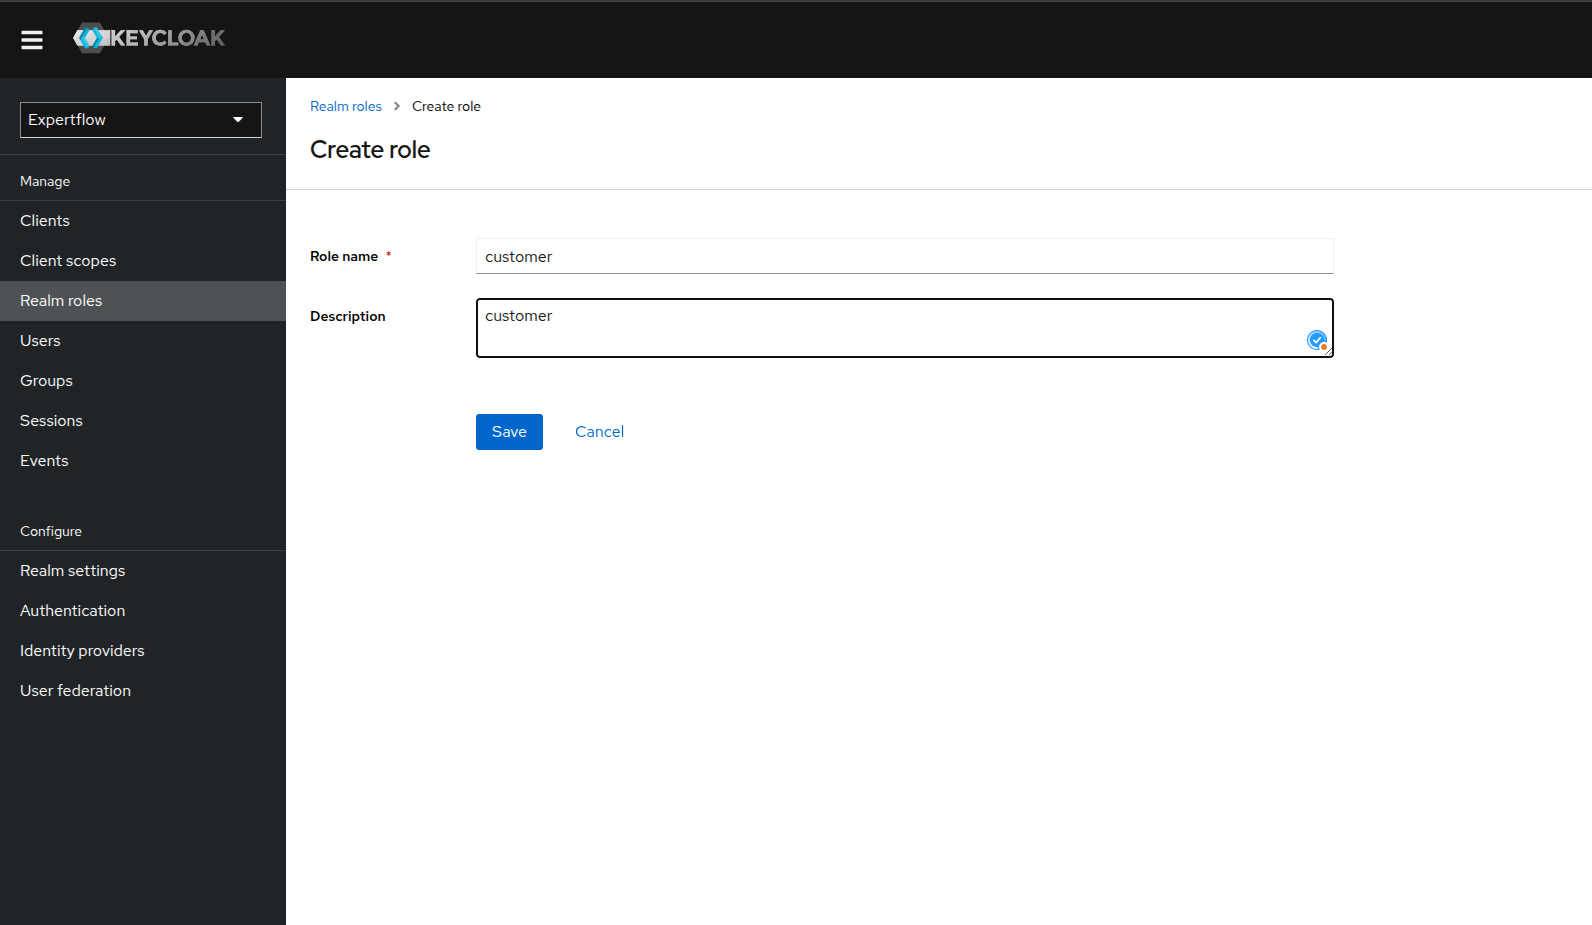
(Included steps after 4.10.1 onwards) After creating customer, assign it a customer role. Click on the Realm roles and check if the customer role exists. If it exists then skip the creation process, else create a customer role.
-
Go to the customer user and the click on Role mapping.
-
Assign customer role to user along with offline_access and uma_authorization.