This guide explains how to onboard a new CX tenant by registering it with the required FQDN and configuration details (Keycloak, Redis, MongoDB, campaigns/surveys), then completing access setup in Grafana. Once done, the tenant is ready for standard CX configuration.
Prerequisites:
To register a tenant, a valid and available FQDN must be provided.
-
In case of an on-prem deployment, single tenant deployment, the FQDN structure can be any eg (companyname.com)
-
In case of the multi-tenant deployment, the FQDN structure must be a combination of tenantId and rootdomain, such as tenantId.root-domain (eg.. tenant1.expertflow.com)
-
Ensure that if cx voice is enabled for the required system
-
Subdomain routing must be configured manually by the IT team.
-
DNS entry for the tenant’s subdomain must point to the multitenant ingress controller.
Once the system is deployed, follow these steps to onboard a tenant
Step 1: Register a New Tenant
-
Register a tenant using the CX Tenant API. This step includes:
-
tenantId,tenantName -
Keycloak configuration object
-
Subdomain information
-
Redis and MongoDB credentials for the tenant external access
-
Survey, campaigns, and dialer configurations (update Campaign and survey URL as per your tenant)
-
Ensure that the specified configuration parameters are updated in the tenant creation payload using your preferred method (Postman or automation script).
-
-
-
You can use:
-
Postman
-
curl -
Any REST client
-
Postman collection for tenant registration is available here.
For release >=CX-5.0.1, use the updated APIs to register or update the tenants as Tenant’s logo is required to be uploaded while registering the tenant.
In case of default tenant (on-prem), tenantId will be “expertflow”
CX Tenant will create a keycloak realm, Media Server domain, and will upload the channel icons to the respective buckets dynamically on Minio/blob storage.
-
When Postman is unavailable or not preferred, the following steps can be used to execute the script.
-
Edit the create tenant script in the post-deployment folder, and update the values of tenantId and the fqdn
cd post-deployment
vi create_tenant.sh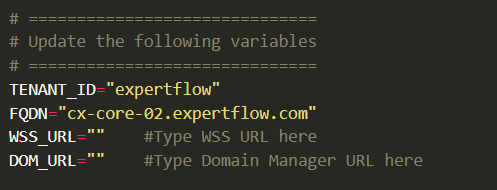
-
-
For release >=CX-5.0.1, this script uses the Expertflow logo for every newly created tenant by default, but if you want to use custom logo for tenant, place the logo in the same directory in which the create_tenant.sh script is placed, and replace the logo file name in the script
--form "logo=@expertflow-logo.png" #replace this file name with the name of your logo file -
If you need to update the Redis or MongoDB passwords for external access, you can modify them in the payload as well.
-
After changing the above, execute the following command to run the script
chmod +x create_tenant.sh
./create_tenant.sh
Upon successful registration:
-
CX Tenant service triggers bootstrap events to all registered webhooks.
Step 2: Register Tenant FQDN on Grafana allowedHosts
Follow the steps in this guide.
Final Step - Start Configuration
Your tenant is now LIVE
You can proceed with standard CX configuration and begin using the platform with tenant isolation enabled.